An Introduction to the Ableton Glue Compressor
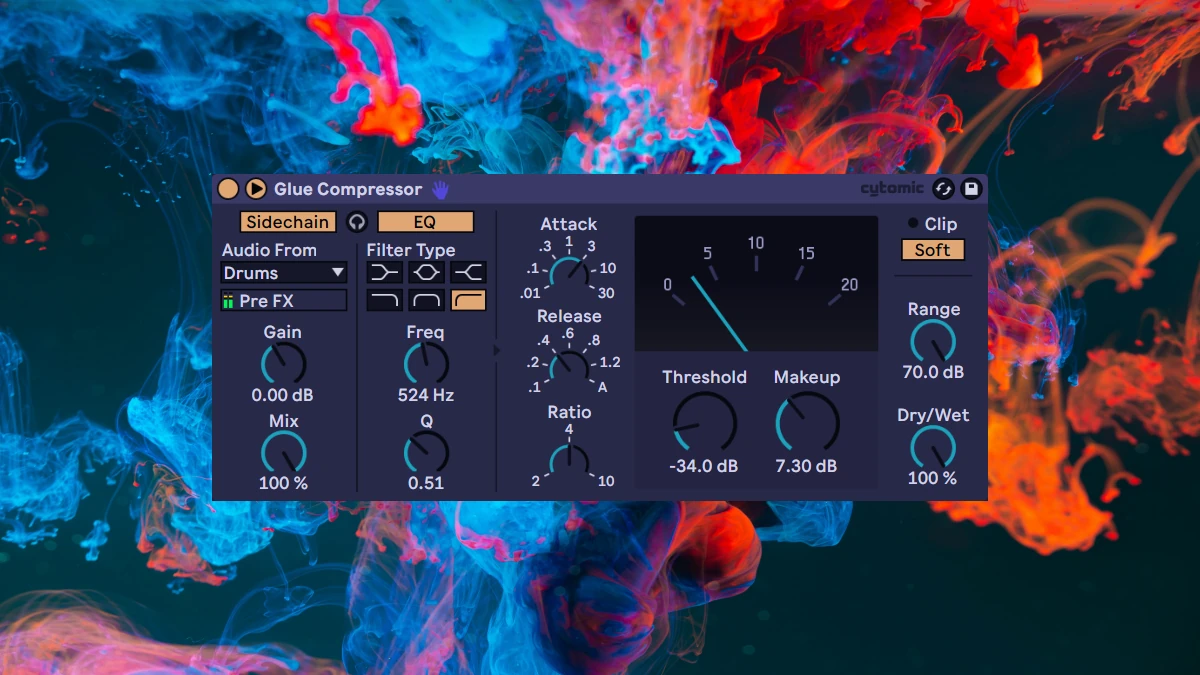
When it comes to stock plugins, Ableton’s Glue Compressor is a standout. Developed by Cytomic, this tool is one of many recreations of the iconic SSL 4000 series G Bus Compressor—a piece of gear beloved by producers for its smooth, rich sound and distinctive character. Despite Ableton's proprietary version of this emulator being over a decade old, the Ableton Glue Compressor remains a versatile, invaluable addition to Ableton Live’s suite of effects.
In this guide, we’ll move beyond the basics and explore advanced techniques to harness the full potential of the Glue Compressor. These techniques will elevate your mixes by enhancing dynamics, shaping transients, and adding punch to your productions.
Bus Processing and Loudness Matching
The 'classic' usage of the Glue Compressor is as a bus processor. This is why it's called the “Glue” Compressor - it's a powerful tool for smoothing out the dynamic relationships between multiple channels of audio. When used in the context of bus processing, the Glue Compressor evenly applies soft knee compression to the channels contained within the bus. This consistency in mixing provides a bus of channels with cohesive dynamics, making them sound like they naturally belong together.
Setting up the Glue Compressor:
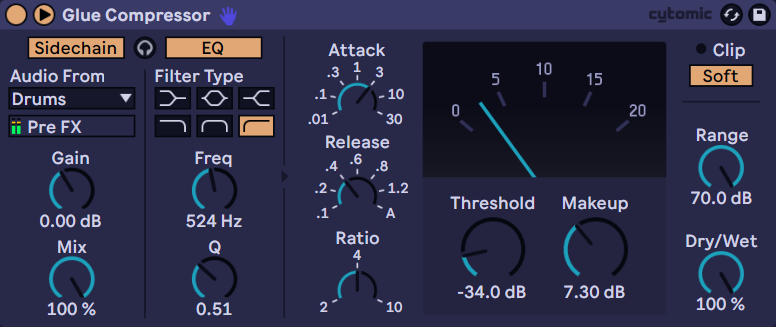
The compressor only activates when the signal exceeds the threshold. Start by lowering the Threshold to control the loudest parts of your drums. You'll know that the threshold is being crossed when the indicator needle starts to move on the compression meter.

Next, adjust the Makeup to ensure the volume of your processed and unprocessed signals are consistent. For a good starting point, estimate the average number the indicator needle is displaying in the Compression Meter, and set the Makeup knob to a similar level in order to offset the change in loudness. When the loudness is properly attenuated, it's easy to toggle the device off and on and compare what the compressor is actually doing to the dry signal for fair A/B comparisons.
To get more precise volume matching, we can observe the volume levels and check our work using the channel mixer. Note how compression affects the dynamics and any changes in the peak and RMS levels. The peak levels are visualized with the tops of the darker segment of the vertical volume bar readout. The loudest peak the audio has reached is displayed in the button in the upper left corner of the channel's mixer (-4.59db in the screenshot). Using this information, it's a straightforward process to exactly match volume levels while using the Glue Compressor to the original unprocessed signal.
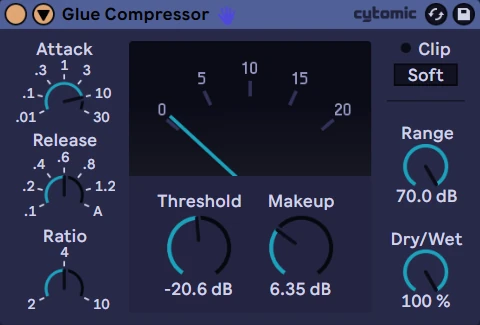
Understanding the Envelope and Ratio Controls
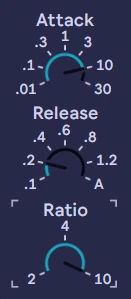
Audio compressors control the dynamic range of a signal, and the attack, release, and ratio parameters shape how the compression behaves. The Attack determines how quickly the compressor engages after the input level exceeds the threshold; a fast attack reduces peaks quickly for a smoother sound but can dull transients, while a slow attack preserves transients, adding punch and clarity. Release controls how quickly the compressor stops reducing gain once the signal falls below the threshold. A low release time reacts quickly and works well for snappier rhythmic sounds but can also be used to create a pumping sensation using a slow release to smooth out dynamics.
The Ratio sets the amount of gain reduction applied to signals above the threshold level, ranging from gentle compression at a low ratio (2:1) for subtle leveling to maximum compression at a high ratio (10:1). The ratio represents the number of decibels above the threshold that will result in one decibel out.
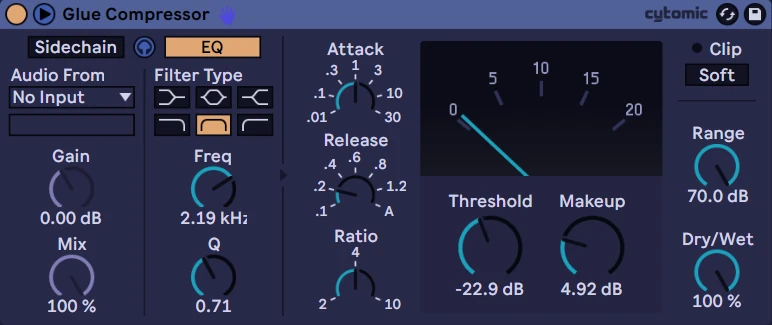
Ableton Glue Compressor Sidechain EQ
We can access the Glue Compressor's advanced parameters by opening the device up via the triangle button in the device's title bar.
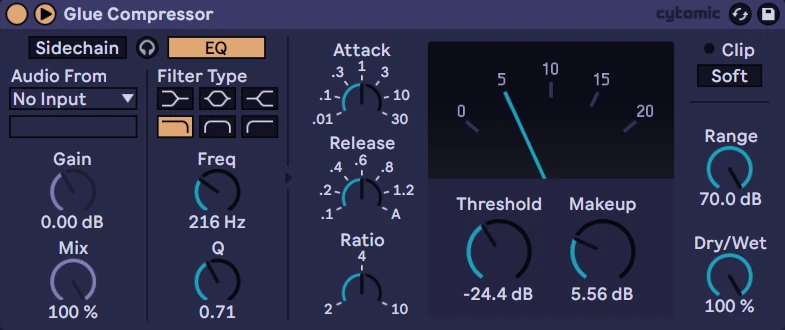
The EQ settings can be seen once the Glue Compressor has been toggled open. Once it's been switched on, Glue Compressor can be tuned to modify certain segments of the frequency range. For example, the Low-Pass filter (pictured) can be enabled to specifically target the kick drum when dialed in with appropriate Freq and Q settings. The EQ settings aren't directly changing the device's output — they're telling the Glue Compressor what to listen for in the incoming audio. In the video's second example, we can change the filter type to High-Pass, and aim a little higher in the spectrum to instead target the snare.
Ableton Glue Compressor Parallel Compression
Another great strategy for the Glue Compressor is to use it in a sort of parallel compression mode by utilizing the Dry/Wet control in the lower right-hand corner of the device's interface. Allowing some dry, unprocessed signal to pass through and blending it together with the processed signal is a great way to add character and nuance to the finished sound. When using the Dry/Wet control, it's important to squeeze a bit more of the Glue Compressor so that it's changes can still be heard in tandem with the unprocessed sound.
Let's start by setting the Attack control very low so that the processed transient is barely audible, and do the same with the Release control. Setting the Glue Compressor up like this emphasizes the room audio and the sustain of the drums. These settings may not sound good on their own in a vacuum. But the trick here is that we're going to blend this processed, heavily compressed sound with the dry signal and allow the dry signal to emphasize the transient part of the drums. The Dry/Wet knob in this method allows us to control the prominence of the sustained element in the defined frequency range of the drums while leaving the original transients intact.
Once we've dialed in an appropriate amount of wet signal and sustain, we can introduce more of the transient into the wet signal by dialing up the Glue Compressor's Attack slightly. This can further enhance the transient part of the signal and add even more depth and articulation to the parallel processing sound.
Adding Punch with the Glue Compressor
Sometimes the sound you're going for can't be dialed in using a synth by itself. A very prominent, forward, punchy attack is an element of a polished patch that often isn't attainable using just using simple envelope controls within the synth itself. The Glue Compressor is the perfect candidate for this task. A slow Attack setting allows more of the transient to pass through before compression begins. A fast release emphasizes the transient further by quickly stopping compression to accentuate the end of the transient and create separation and contrast with the sustain stage of the sound, especially as Makeup is increased. Turning up the Release can add further punch and highlighting the attack stage by giving more time for the compressed transient. If the goal is to truly maximize the punchy transient in the finished sound, use a Ratio of 4:1 or 10:1for more aggressive compression.
Sidechain Delay
Glue Compressor can be used to create separation between a voice and it's associated delay effects using the sidechain section. Use the intended instrument's own signal as the Sidechain trigger after an effect that exists on a send Channel. Doing this causes the dry signal to trigger the sidechain and pull the wet delay signal back from overlapping with the actual notes being played. Creating separation between the wet and dry signal creates clarity and emphasizes the rhythmic timing of the delay.
In this context, the Attack setting can be used to change the timing between the dry signal's note and the compressor activating to pull the delay back. Faster Attack will create an immediate and clear separation between the dry note and the delay. A longer Attack will create more of a pumping ramp to the change.
A fast Release time ensures that the compression deactivates quickly in order to preserve and emphasize the next dry note. The intensity of this sidechaining effect can be finely tuned by dialing in the Threshold and Makeup Gain controls.
Sidechain Bandpass
There are times when working with audio that a narrow band of audio is the desired focus for compression. In the video, the example in question is a guitar part is jumping in and out of the mix, with the higher notes being very forward in the mix and he lower parts getting buried in the mix. With these fluctuations in volume and audibility, this guitar part is a great candidate for compression. We can use the Glue Compressor to specifically hone in and reduce the loudest part of the signal when it crosses the threshold while simultaneously bringing forward some lower notes with additional gain applied. To do this, we can utilize the sidechain section in tandem with the bandpass filter type. Doing this allows us to concentrate the focus of the compressor to a very narrow specificity and surgically target a part of any channel that is jumping forward in the mix.
Reverb Glue
As with the previously mentioned technique for creating space within a delay signal, the instrument itself doesn't have to be the main focus of a Glue Compressor. Another effect-driven workflow for utilizing the Glue Compressor is to create cohesion between an instrument and it's spatial ambiance, reverb or room sound to add character to the finished voice. By pushing up the quietest part of the signal with the Glue Compressor, we can have additional control over the predelay of the reverb, which can effectively make the reverb element of the signal sound like it's happening sooner than it is. This adds up to a great deal of control over the tonality of any element. We're able to control how forward the transient element of the sound is using the Attack control. A higher Attack curve that opens up over time can help the dry and reverb elements of the sound to sound more connected as they are blended together over 10 or even 30 milliseconds.
Whole Mix Parallel Compression with the Ableton Glue Compressor
Parallel Compression as mentioned above is also applicable on the Main bus for the whole mix of a track. Using the Dry/Wet control, it's possible to dial in all sorts of different compression levels and finsihed sounds using a single instance of the Glue Compressor in this way. A mild amount of compression for the track as a whole can add a lot of cohesion between different voices and the space that they occupy. At it's core, this is what the device was designed for - creating the sensation that various sounds belong togeher as a collective whole. This is why this process of adding a light amount of compression to busses and the master track is such a widespread and industry standard practice.
Want to Learn More About the Ableton Glue Compressor, Ableton Live and Electronic Music?
If you'd like to learn more about the mixing and mastering process as well as the fantastic quality proprietary instruments that come packed wih Ableton Live for jus this purpose, check out our course Mixing and Mastering with Ableton Live. It's jam packed with 20+ hours of qualiy lessons abou devices like the Glue Compressor, as well as practiced, professional workflows for consistently turning out polished, finished tracks that are ready for streaming platforms and physical media. For another mixing specific lesson here on the blog, check out our Ultimate Guide to Managing Latency in Ableton Live.
